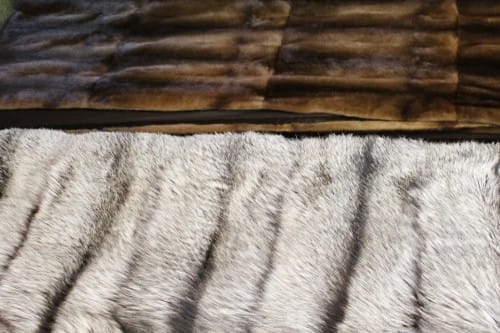
Remodeling a Fur Coat into a Throw or Blanket
Can be a rewarding project, giving new life to an old garment. Here’s a step-by-step guide to help you through the process:
It will always be better to let a fur professional to do the work, The following are the steps that need to be taken.
The cost for this remodel will be $995, which includes a new velvet backing.

Fur Blanket Remodel
- Assess the Fur Coat: Examine the fur coat to determine its size, condition, and type of fur. Ensure that the fur is in good condition without any significant damage or wear.
- Measure and Plan: Measure the dimensions of the fur coat to determine the size of the blanket or throw you want to create. Consider if you want to keep the coat’s original shape or if you want to cut it into a different shape for the blanket.
- Gather Materials: Apart from the fur coat, you’ll need a few other materials. A sewing machine, scissors, thread, pins, fabric for backing (optional), and a sewing needle. If you plan to do any hand sewing.
- Prepare the Coat: If the coat has a lining, carefully remove it using scissors or a seam ripper. Lay the coat flat on a large work surface.
- Cutting: Using sharp razor and carefully cut the coat according to your planned dimensions, for the blanket or throw. You may choose to cut the coat into squares, rectangles, or any other desired shape.
- Optional Backing: If you want to add a backing to the fur blanket for added warmth or stability. Select a fabric that complements the fur. Cut the backing fabric to match the size of the fur pieces.
- Pin and Sew: If you’re adding a backing, place the fur pieces and backing fabric together with the right sides facing each other. Pin around the edges to secure them in place. Then, using a sewing machine or hand sewing needle, sew around the edges. leave a small opening for turning the blanket right side out.

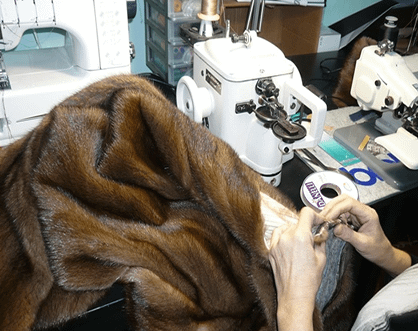
Fur sewing machine
- Turn and Finish: Carefully turn the blanket right side out through the opening. Use a blunt object, like a knitting needle, to gently push out the corners and edges for a clean finish. Hand-stitch the opening closed using a slip stitch or ladder stitch.
- Final Touches: Give the blanket a final once-over to ensure all seams are secure and there are no loose threads. You may also choose to trim any excess fur or uneven edges for a polished look.
- Enjoy Your New Fur Blanket: Once your fur blanket or throw is complete, it’s ready to be used and enjoyed! Place it on your bed, sofa, or favorite chair for added warmth and luxury.
Remember to take your time with each step and handle the fur coat carefully to avoid damaging the fur. With patience and attention to detail, you can transform an old fur coat into a beautiful and functional blanket or throw that will be cherished for years to come.

Marc Kaufman Furs NYC
Since 1870 the Marc Kaufman Fur Family has been manufacturing fur coats and fur jackets in NYC , designing luxury furs, repairing luxury furs and altering along with providing cold fur storage and fur cleaning for fur stores and individuals. With over 150 years of fur expertise "Marc Kaufman Furs "A Name You Could Trust for All your Fur Needs".
"Experience Does Matter"
World renowned for our luxurious furs and craftsmanship, our fur coats are worn by socialites, celebrities, hip hop artists and just ordinary people that want to be warm and look beautiful. When you purchase a fur at
Marc Kaufman Furs NY you know that you are getting a quality fur coat, backed by reliability, great customer care and service.
Marc Kaufman Furs in NYC has the most complete selection of the finest fashion fur coats: full length mink coats, mink strollers, mink jackets, fox coats, fox jackets, sable coats, and sable strollers. And for the softest in furs we have the finest Mink coats, Mink jackets, Chinchilla coats, Chinchilla jackets, Lynx coats, Lynx jackets, Sable coats, Sable Jackets and many other types of fur jackets and fur coats. A full range of fur colors including mahogany mink, black mink, and whiskey mink. All furs at very attractive prices. We can also customize a color to your individual taste.
Buying a Marc Kaufman Fur is the Perfect Luxury Gift to give your loved one. During Christmas,Your Anniversary, a Birthday, Mothers Day or just saying I Love You, surprise them with The Best Gift Idea, a Marc Kaufman Fur.
Our Designer Furs come from different parts of the world. We have some of the most beautiful Italian designed fur coats,some French designed fur garments and some beautifully designed fur coats from our NY fur designers. I must say we have a beautiful fur collection.
Special Orders is our Specialty. We can take a collar from one fur coat, a sleeve treatment from another fur coat, a color from another fur coat, It's all your Choice.
Marc Kaufman Furs has a modern cold fur storage vault and a special fur cleaning facility all in NYC. This fur cleaning facility was designed to clean furs, clean leathers and clean shearlings. Special fur cleaning methods were passed down from 5 generations of Kaufman's.
Expert Fur Remodeling, we offer many designer styles that will modernize your older fur. Let us take your old and tired fur coat and make it look new again.
Fur is no longer just for warmth on the coldest of days, furs has moved into the hot "must have" fashion category and is worn from day to night and across all seasons.
Purchasing a Marc Kaufman Fur is a perfect Luxury Gift for your Lady or for your Man. Every time they wear this Marc Kaufman Fur, they will feel the warmth and memory of their gift from you and the occasion that this gift was given.